


MOTD TUTORIAL.
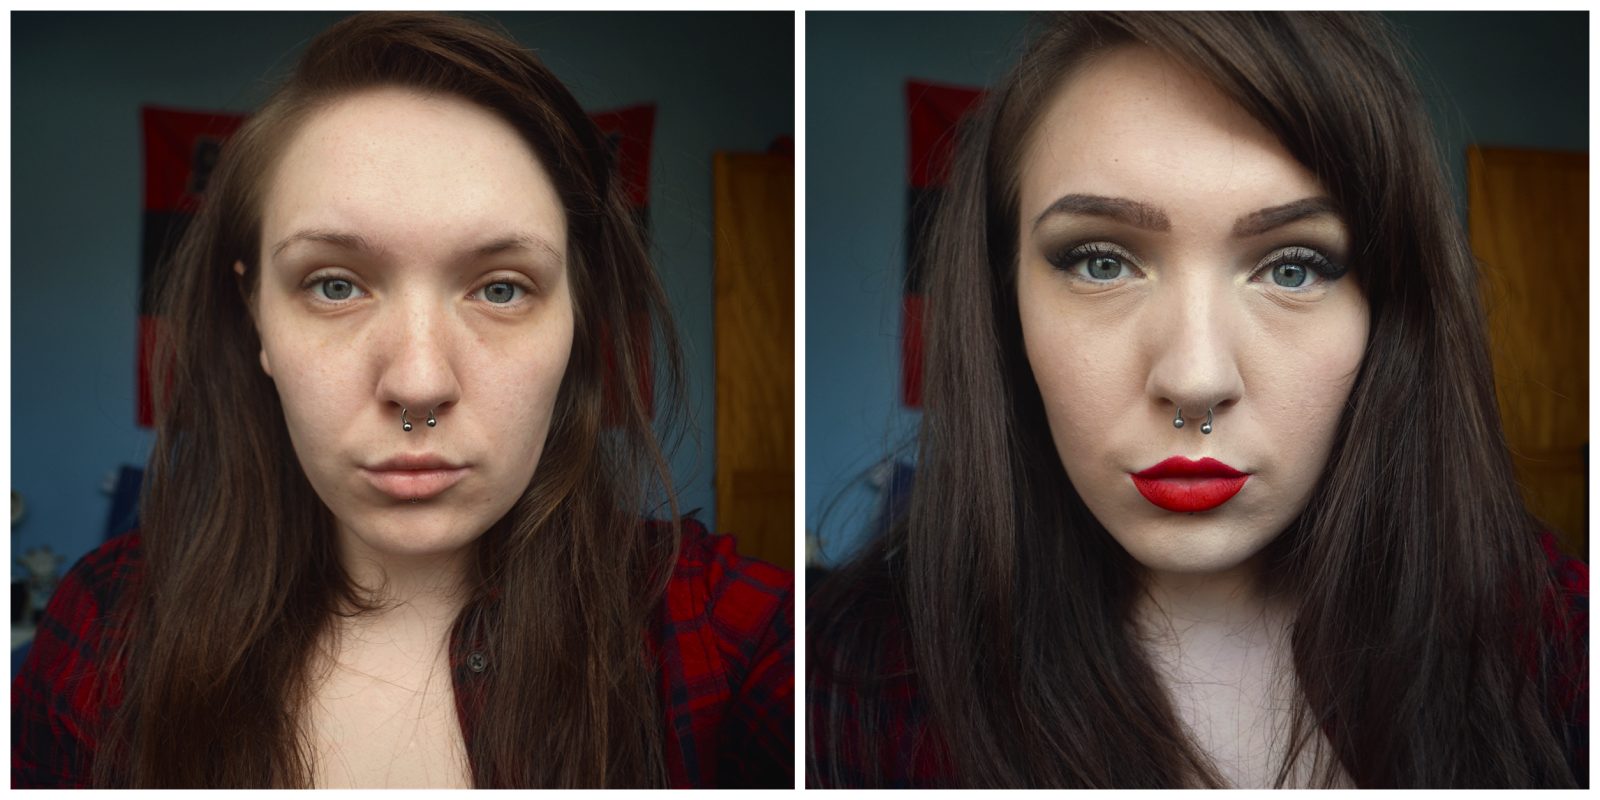
Hello everyone, today I will be showing you how I achieved this makeup look today and how I went from left to right!

STEP 1- PRIMER
I primed my skin with the Nivea Men post shave balm in sensitive. If you don't know what this product is you need to visit Nikkietutorials on youtube! This balm works perfect as a primer as the glycerin in it allows the foundation to stick to your face making it last all day.


STEP 2- FOUNDATION
For foundation today I used the Maybelline Fit Me foundation with the luminous/smooth finish and a damp Real Techniques miracle face sponge to apply. I actually LOVE this foundation, it blends so well and the coverage is amazing. It leaves your skin looking and feeling healthy with a natural glow without looking cakey.
STEP 3- EYEBROWS


For eyebrows I used my ABH brow pomade in dark brown and a small tipped artist brush. I prefer using fine tip brushes as I can get a more precise line for the outline and it means I can get smaller strokes to copy brow hairs. The pomade itself lasts all day without smudging and fading which is a plus however it does dry out which makes it a chore to apply, but to get around this I just spritz my brush with MAC Fix + which gives it a bit of moisture.
STEP 4- EYESHADOW

For this look all of the eyeshadow I used was from the Younique Moonstruck Addiction Shadow Palette in No 2.


Firstly I took a flat top shadow brush with the shade 'honorable' and packed it onto my eyelid and slightly into the crease. It doesn't have to be particularly neat as I later blended it out.


Next I took an angled fluffy brush from my Ebay set (For more info check out my earlier blog post) and the shade 'cocky' and blended it into the crease and up towards my brown bone. Tip- use a very light hand when blending to help with transitioning. Then using a pointed brush I used 'peppy' and concentrated on the outer v of my eye going back with my fluffy brush and blending it.

Lastly taking 'blissful' back onto my flat top brush I packed it onto my eyelid and lightly outwards. After this there was a lot of fall down under my eye so I took a makeup wipe and cleaned it away.


Next I took the Bourjois Liner Feutre in 'ultra black' and did a thick winged liner and applied the Revlon Ultimate All in One mascara.
STEP 5- FACE


I used two concealers for my makeup as they both have different qualities. Under my eyes I used the Soap and Glory Kickass concealer which is really creamy so you need to apply it with your fingers first to warm the product up. Once applied I used my damp Real Techniques miracle complexion sponge to blend it out. For my blemishes and the redness around my nose I used the Maybelline Age Rewind in 'light' and blended with my RT sponge.

For contour I used my angled face brush from my Ebay set and the shade 'honorable' from my moonstruck palette. I always use my finger first to lay the shadow where I want it; the hollows of my cheeks, jawline and temples. Then continue to use the brush to blend it out.


I used the Seventeen Instant Glow in 'pink bronze' for my bronzer. This bronzer is super pigmented so I used the Real Techniques powder brush to blend out with a small amount of product.

For blush I used my MAC blush in 'melba' and my RT powder brush to gently apply it above my contour. This gives a natural and understated colour to the cheeks.


For highlighter I used the Makeup Revolution highlighter in 'golden lights' with a pointed brush from my Ebay set. This highlighter is extremely pigmented so I took a light amount and applied to the tops of my cheek bones, tip of the nose, cupids bow and chin. I cannot recommend this highlighter enough, its so pigmented and looks gorgeous on the skin and its only £3.00, I honestly love it.

After those steps I came out with this.
STEP 6- LIPS.

For lips I used my Jeffree Starr liquid lipstick in 'Redrum'. This is a gorgeous colour and it is so pigmented so you only really need one coat of it.

And this is how it came out. I would recommend all of the products used and they can all be found online. See you in the next post!
Jamie.


0 comments